
1.) 環境
a.) CentOS release 4.6 最小安裝
b.) Apache 2
c.) JRE
d.) Tomcat 6.0.16
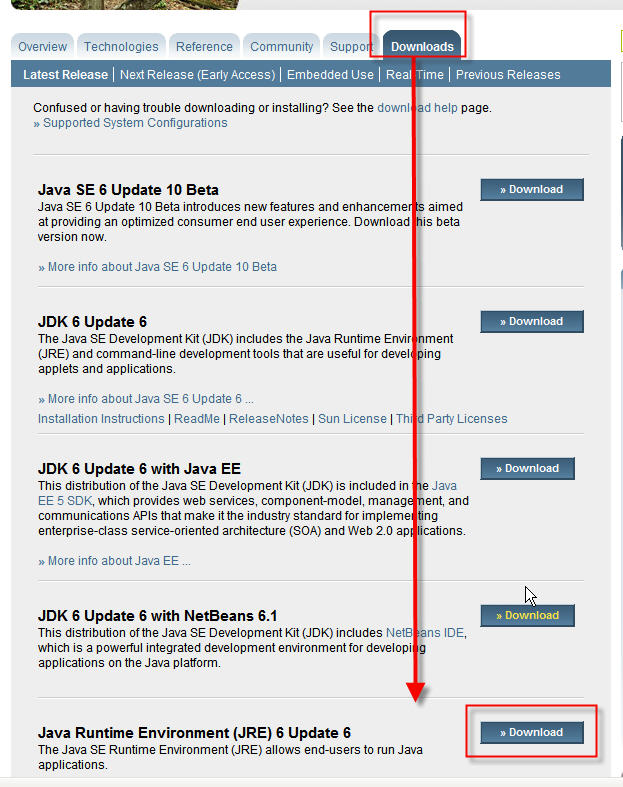
2.) 下載安裝 Java 2 Standard Edition Runtime Environment (JRE)
a.) 到這裡去 http://java.sun.com/j2se 下載 Java Runtime Environment (JRE) 6 Update 6
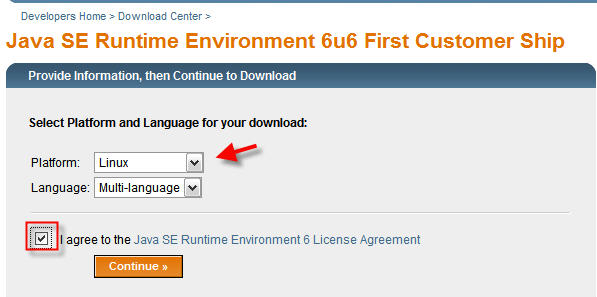
b.) 選擇你的安裝平台
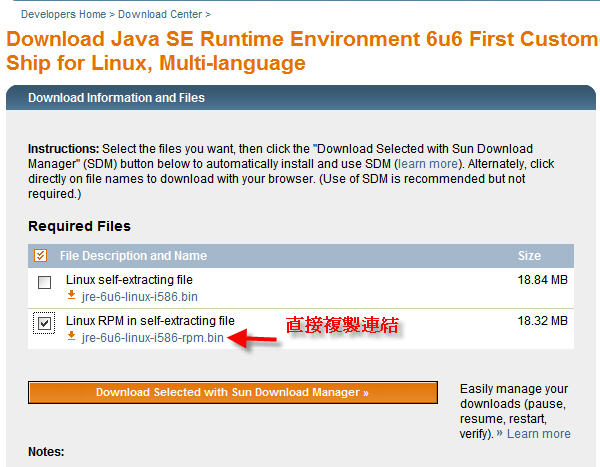
c.) 可以直接複製這個連結
d.) 然後在 Linux 上使用 wget 下載,下載完後會有一個怪字串的檔案

e.) 再將它重新命名成 jre-6u6-linux-i586-rpm.bin

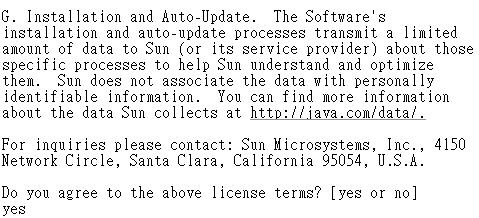
f.) 變更權限,讓這檔案可以執行,chmod u+x jre-6u6-linux-i586-rpm.bin,接著下 ./chmod u+x jre-6u6-linux-i586-rpm.bin,會出現版本宣告,可按空白鍵直到要你輸入是否安裝的提示字元,當然是 yes
g.) 它這個動作會解出 RPM,新版的 JRE 它會在解的過程中就自行安裝了
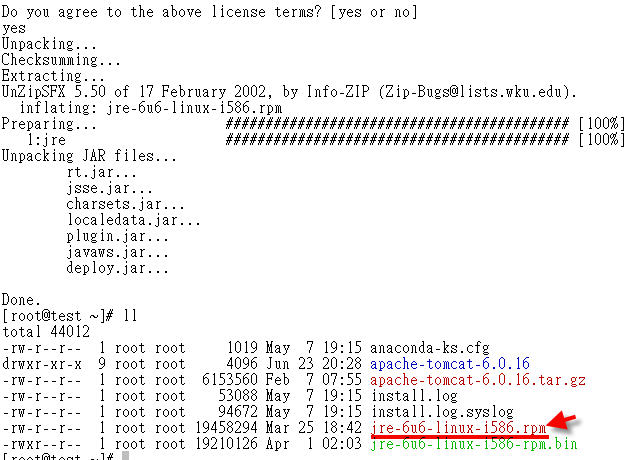
h.) 設定環境變數,JRE 安裝後的目錄是在 /usr/java,如下圖的情況是這樣子的,所以可以直接定義 export JRE_HOME=/usr/java/latest

3.) 下載安裝 Tomcat Binary Distribution
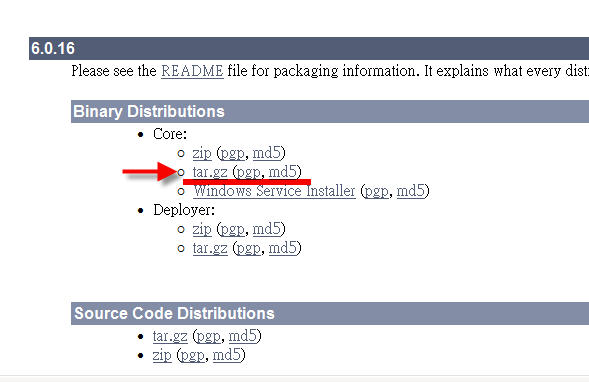
a.) 到這裡 http://tomcat.apache.org/download-60.cgi 下載 Tarball 檔
b.) 解開 tarball 檔,將 apache-tomcat-6.0.16 目錄放到 /usr/java/,(為何放這裡,只是因為方便)
4.) 啟動 Tomcat
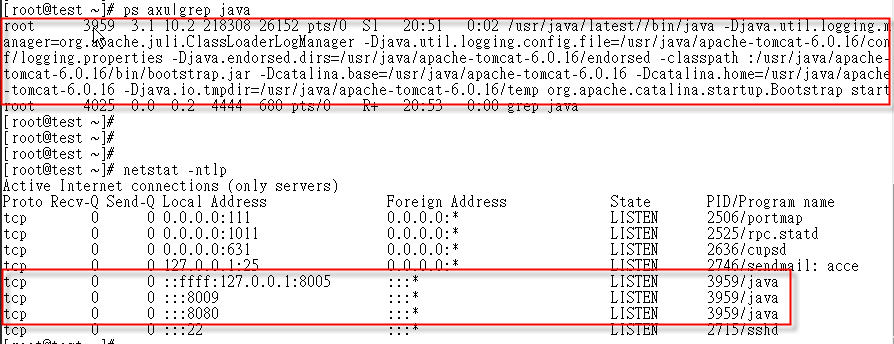
a.) 執行 /usr/java/apache-tomcat-6.0.16/bin/startup.sh
你就可以看到 tomcat 起來了
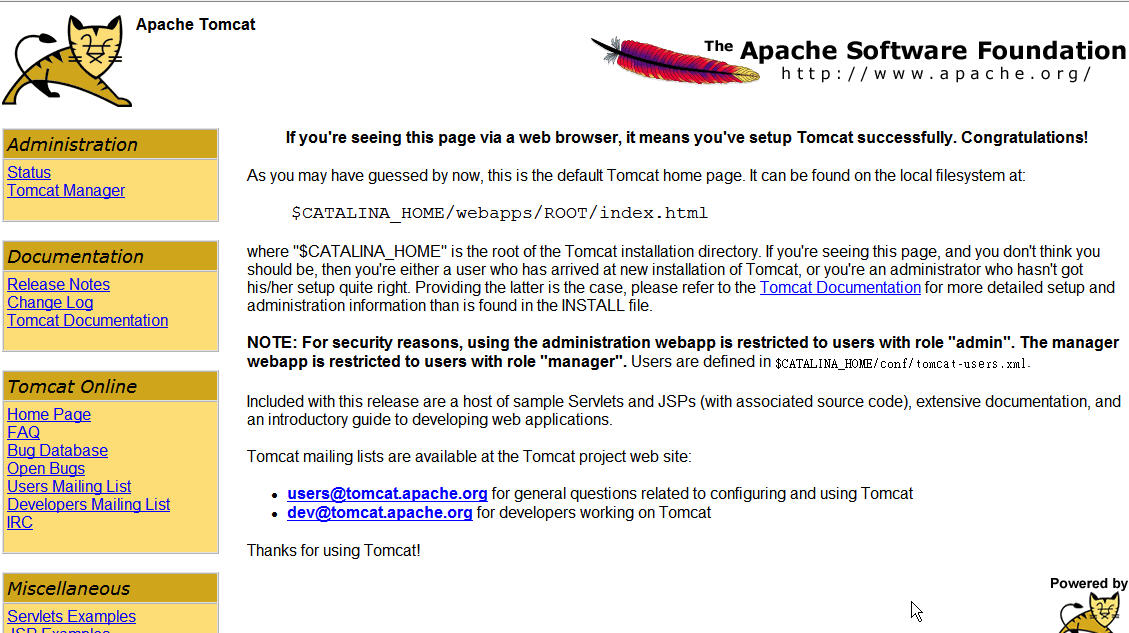
b.) 瀏覽 http://192.168.1.93:8080,如果你目到如下畫面,就表示你成功了
PS: tomcat 停止的方法是,執行 /usr/java/apache-tomcat-6.0.16/bin/shutdown.sh
5.) 整合 Apache
a.) 安裝 Apache
yum install httpd httpd-devel
b.) 至 http://tomcat.apache.org/download-connectors.cgi 下載 connector
c.) 解開 tomcat-connectors-1.2.26-src.tar.gz,並切換至 tomcat-connectors-1.2.26-src/native/ 目錄
d.) 編譯
./configure –with-apxs=/usr/sbin/apxs ; make ; make install
e.) 複製檔案
cp tomcat-connectors-1.2.26-src/conf/workers.properties /etc/httpd/conf.d
f.) 編輯設定
vi /etc/httpd/conf/workers.properties
workers.tomcat_home=/usr/java/apache-tomcat-6.0.16/
vi /etc/httpd/conf.d/mod_jk.conf
LoadModule jk_module modules/mod_jk.so
<IfModule mod_jk.c>
JkWorkersFile /etc/httpd/conf.d/workers.properties
JkLogFile /var/log/httpd/mod_jk.log
JkLogLevel info
JkLogStampFormat “[%a %b %d %H:%M:%S %Y]”
JkMount /* ajp13
</IfModule>
Quote:
1. install the following packages if you missed
— httpd
— httpd-devel
— tomcat5
2. download Tomcat Connectors
— JK 1.2
http://tomcat.apache.org/download-connectors.cgi
3. extract the download file
and go to the directory
jakarta-tomcat-connectors-1.2.15-src/jk/native
4. have a look on BUILDING if you want
5. build
— go to the directory
jakarta-tomcat-connectors-1.2.15-src/jk/native
— run the following command
./configure –with-apxs=/usr/sbin/apxs
if there is an error, check with config.log
(for me, i miss a cpp complier, and i choose to install gcc-c++)
— run make
make
cp ./apache-2.0/mod_jk.so /usr/lib/httpd/modules/
7. JKWorkersFile
— go to directory
jakarta-tomcat-connectors-1.2.15-src/jk/conf
— edit the workers.properties
i. find the tomcat home and java home directory variable
workers.tomcat_home=/var/tomcat3
…
workers.java_home=/opt/IBMJava2-13
and change the path point to the corresponding home directory in your system
you may reference to /etc/tomcat5/tomcat5.conf
ii. change the java lib for the worker
find the following comments
#
# The JVM that we are about to use
#
!!! and change the setting according to your java version and platform
— run the following command
cp workers.properties /etc/httpd/conf/
9. edit httpd.conf
— open /etc/httpd/conf/httpd.conf in your favorable editor
— find the section LoadModule
and add the following line on the last LoadModule declaration
# for integrate tomcat 5
LoadModule jk_module modules/mod_jk.so
— find the section IfModule
and add the following at last
# for integrate tomcat 5
<IfModule mod_jk.c>
JkWorkersFile /etc/httpd/conf/workers.properties
JkLogFile /var/log/httpd/mod_jk.log
JkLogLevel info
JkLogStampFormat “[%a %b %d %H:%M:%S %Y]”
JkMount /* ajp13
</IfModule>
10. test configuration is error-free
apachectl -t
11. restart httpd and tomcat5
12. test your server
!!! This is the first time I try to integrate tomcat with apache
So if there are mistakes, please drop me some words
Thanks
留言