
。硬體設備
CPU: Intel(R) Xeon(R) CPU X3440 @ 2.53GHz
主機板: SuperMicro X8SIA-F (http://www.supermicro.com/xeon_3400/Motherboard/X8SIA.cfm?IPMI=Y)
記憶體: Kingston 2GB DDR3 1333 桌上型記憶體(KVR1333D3N9/2G) x 4 = 8G (非ECC,遜卡了點:))
硬碟抽取盒: SUPERMICRO CSE-M35T-1B Black 5 Bay Hot-Swapable SATA HDD Enclosure (http://www.supermicro.com/products/accessories/mobilerack/CSE-M35T-1.cfm)
硬碟: WD10EADS (WD 1000GB/7200轉/32M/3.5吋/SATAII) x 4
電源供應器: Cooler Master Real Power Pro 360W
機殼: LanCool PC-K60 龍族系列機殼
RAID卡: DELL PERC 6i (用來組RAID6 http://ssorc.tw/?p=1082)
。分割硬碟
Raid6 可以同時間壞兩顆,空間容量 = 4顆 – 2顆 = 4T – 2T,所以組起來只剩2T可以用
格式化 /dev/sda3 時好久
Disk /dev/sda: 1999.3 GB, 1999307276288 bytes
255 heads, 63 sectors/track, 243068 cylinders
Units = cylinders of 16065 * 512 = 8225280 bytesDevice Boot Start End Blocks Id System
/dev/sda1 * 1 1958 15727603+ 83 Linux
/dev/sda2 1959 67229 524289307+ 83 Linux
/dev/sda3 67230 242676 1409278027+ 83 Linux
/dev/sda4 242677 243068 3148740 5 Extended
/dev/sda5 242677 243068 3148708+ 82 Linux swap / SolarisFilesystem Size Used Avail Use% Mounted on
/dev/sda1 15G 1.9G 12G 14% /
/dev/sda2 485G 199M 460G 1% /home
/dev/sda3 1.3T 198M 1.3T 1% /data
。安裝CentOS 5.4 x64
套件只裝: GNOME、基礎系統的X視窗系統、基礎、撥號網路支援,其它都不裝
。關閉不需要的服務
chkconfig NetworkManager off
chkconfig avahi-daemon off
chkconfig avahi-dnsconfd off
chkconfig bluetooth off
chkconfig capi off
chkconfig conman off
chkconfig cups off
chkconfig dnsmasq off
chkconfig dund off
chkconfig firstboot off
chkconfig httpd off
chkconfig irda off
chkconfig isdn off
chkconfig kudzu off
chkconfig lvm2-monitor off
chkconfig mcstrans off
chkconfig mdmonitor off
chkconfig mdmpd off
chkconfig multipathd off
chkconfig netconsole off
chkconfig netfs off
chkconfig netplugd off
chkconfig nfs off
chkconfig nfslock off
chkconfig nscd off
chkconfig ntpd off
chkconfig oddjobd off
chkconfig pand off
chkconfig pcscd off
chkconfig portmap off
chkconfig psacct off
chkconfig rdisc off
chkconfig readahead_later off
chkconfig restorecond off
chkconfig rpcgssd off
chkconfig rpcidmapd off
chkconfig rpcsvcgssd off
chkconfig saslauthd off
chkconfig tcsd off
chkconfig vncserver off
chkconfig wdaemon off
chkconfig winbind off
chkconfig wpa_supplicant off
chkconfig ypbind off
chkconfig yum-updatesd off
。建立 cross 帳號
useradd cross
passwd cross
。更新套件
yum -y update
。設定開機等待時間
vi /boot/grub/grub.conf
timeout=2
。啟用 vncserver 給 cross 帳號用
vi /etc/sysconfig/vncservers
# VNCSERVERS=”2:myusername”
# VNCSERVERARGS[2]=”-geometry 800×600 -nolisten tcp -nohttpd -localhost”
VNCSERVERS=”2:cross”
VNCSERVERARGS[2]=”-geometry 800×600 -nolisten tcp -nohttpd”
# 切換到 cross 帳號設定密碼
su – cross
vncpasswd
exit
# 讓 vnc 使用 GNOME 介面
vi /home/cross/.vnc/xstartup
# 將最後一行註解
#twm &
# 加入一行
gnome-session &
service vncserver start
chkconfig vncserver on
。設定 iptables
# 我的習慣不會使用 init.d/ 裡的 iptables 來啟動服務,而是自寫一個 iptables.sh放在 /etc/rc.local
# 暫時這樣子
vi /etc/sysconfig/iptables
改變
# Firewall configuration written by system-config-securitylevel
# Manual customization of this file is not recommended.
*filter
:INPUT ACCEPT [0:0]
:FORWARD ACCEPT [0:0]
:OUTPUT ACCEPT [0:0]
:RH-Firewall-1-INPUT – [0:0]
-A INPUT -j RH-Firewall-1-INPUT
-A FORWARD -j RH-Firewall-1-INPUT
-A RH-Firewall-1-INPUT -i lo -j ACCEPT
-A RH-Firewall-1-INPUT -p icmp –icmp-type any -j ACCEPT
-A RH-Firewall-1-INPUT -p 50 -j ACCEPT
-A RH-Firewall-1-INPUT -p 51 -j ACCEPT
-A RH-Firewall-1-INPUT -p udp –dport 5353 -d 224.0.0.251 -j ACCEPT
-A RH-Firewall-1-INPUT -p udp -m udp –dport 631 -j ACCEPT
-A RH-Firewall-1-INPUT -p tcp -m tcp –dport 631 -j ACCEPT
-A RH-Firewall-1-INPUT -m state –state ESTABLISHED,RELATED -j ACCEPT
-A RH-Firewall-1-INPUT -m state –state NEW -m tcp -p tcp –dport 22 -j ACCEPT
-A RH-Firewall-1-INPUT -j REJECT –reject-with icmp-host-prohibited
COMMIT為
# Firewall configuration written by system-config-securitylevel
# Manual customization of this file is not recommended.
*filter
:INPUT ACCEPT [0:0]
:FORWARD ACCEPT [0:0]
:OUTPUT ACCEPT [0:0]
:RH-Firewall-1-INPUT – [0:0]
-A INPUT -j RH-Firewall-1-INPUT
-A FORWARD -j RH-Firewall-1-INPUT
-A RH-Firewall-1-INPUT -i lo -j ACCEPT
-A RH-Firewall-1-INPUT -p icmp –icmp-type any -j ACCEPT
-A RH-Firewall-1-INPUT -m state –state ESTABLISHED,RELATED -j ACCEPT
-A RH-Firewall-1-INPUT -m state –state NEW -m tcp -p tcp –dport 22 -j ACCEPT
-A RH-Firewall-1-INPUT -s 10.10.10.63 -m state –state NEW -j ACCEPT
-A RH-Firewall-1-INPUT -j REJECT –reject-with icmp-host-prohibited
COMMIT
service iptables restart
。安裝vim (編輯時才有顏色)
yum install vim-enhanced
。設定 samba
yum install samba samba-client.x86_64 samba-common.i386 -y
vim /etc/samba/smb.conf
[global]
unix charset = utf8
display charset = utf8
dos charset = cp950# recycle 參考 http://ssorc.tw/?p=1084
# 朋友說 readahead 可以讓檔案傳輸時加快,但我還沒感覺
vfs objects = recycle readahead
readahead:length = 16777216
recycle:keeptree = yes
recycle:versions = yes
ecycle:repository = ./smb_recycle/%uworkgroup = SSORC
server string = Samba Server Version %v
netbios name = st
# logs split per machine
log file = /var/log/samba/%m.log
# max 50KB per log file, then rotate
max log size = 50
security = user
passdb backend = tdbsam
# the login script name depends on the machine name
# the login script name depends on the unix user used
# disables profiles support by specifing an empty path
#obtain list of printers automatically on SystemV
[homes]
comment = Home Directories
browseable = no
writable = yes
[data]
comment = cross’s data
path = /data/smb_share
public = no
writable = yes
smbpasswd -a cross
mkdir /data/smb_share
chown cross.cross /data/smb_share/
service smb restart
chkconfig smb on
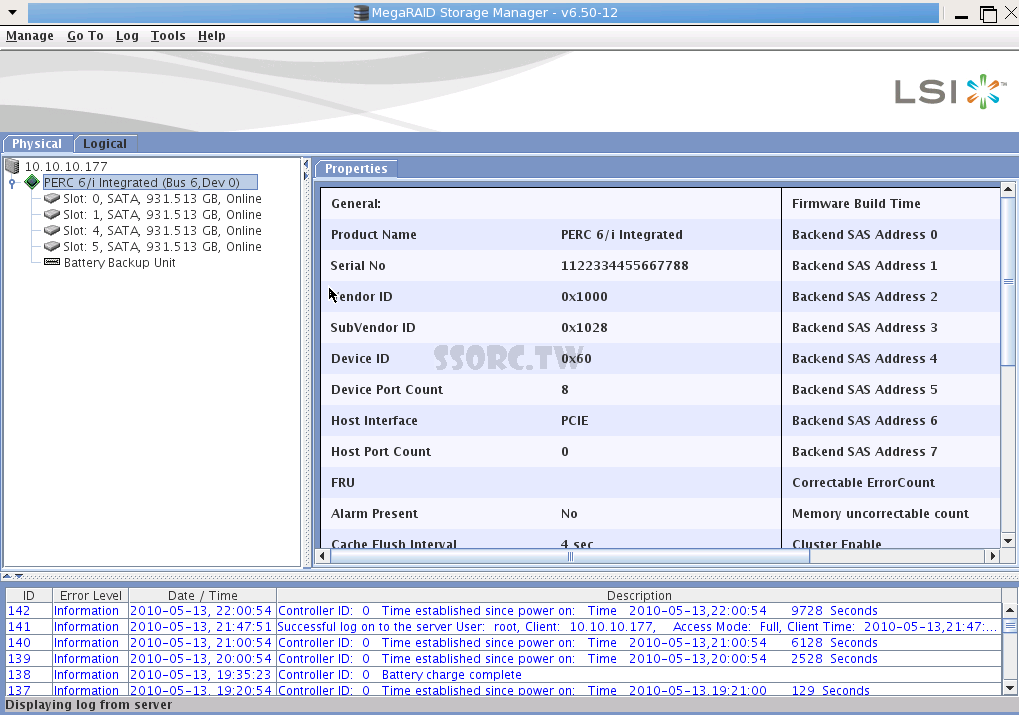
。安裝 RAID 卡的管理程式
# Dell 6i 跟這張卡基本上相同 http://www.lsi.com/storage_home/products_home/internal_raid/megaraid_sas/megaraid_sas_8888elp/index.html
# 所以管理程式可以套用
# 下載這個 MegaRAID Storage Manager – Linux (MegaRAID Release 4.4)
# 檔名 6.50-12_Linux_MSM.zip
# 需要的套件 compat-libstdc++
yum install compat-libstdc++
# 其它沒裝前它會提示你少了 libstdc++.so.5,不過還是會裝完 MSM
# 也可以 yum install libstdc++.so.5 就裝的起來
# 安裝MSM 執行 ./install.sh
# 要重開機
# 它 Listen port 49152、執行程式 mrmonitord
# 應用程式→系統工具→MegaRAID Storage Manager StartupUI
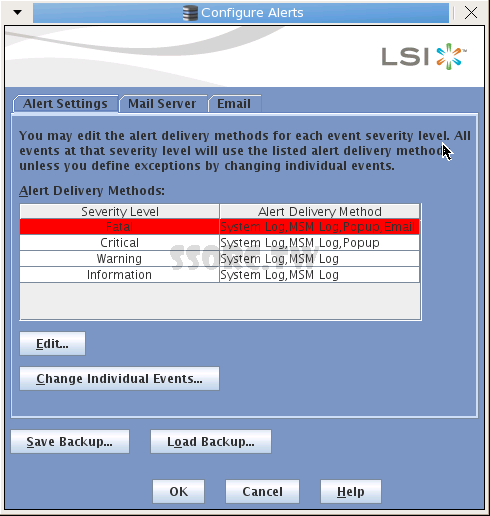
# 它的 alert 功能
# 卡還有支援SNMP,6.50-12_Linux_MSM.zip 裡還包含 sas_snmp-3.17-1056.i386.rpm 及 sas_ir_snmp-3.17-1056.i386.rpm,我看這兩個內容物都相同,所以隨便挑一個裝了吧
# 但前提要先裝 snmpd
yum install net-snmp net-snmp-utils
# 再裝 sas_snmp,它會在/etc/snmp/snmpd.conf多一行
pass .1.3.6.1.4.1.3582 /usr/sbin/lsi_mrdsnmpmain
# 先啟動 snmpd
# 就可以抓到卡的一些資訊
snmpwalk -v1 -ccross localhost .1.3.6.1.4.1.3582
# snmpd 及 lsi_mrdsnmpd 都要啟動
chkconfig snmpd on
chkconfig lsi_mrdsnmpd on
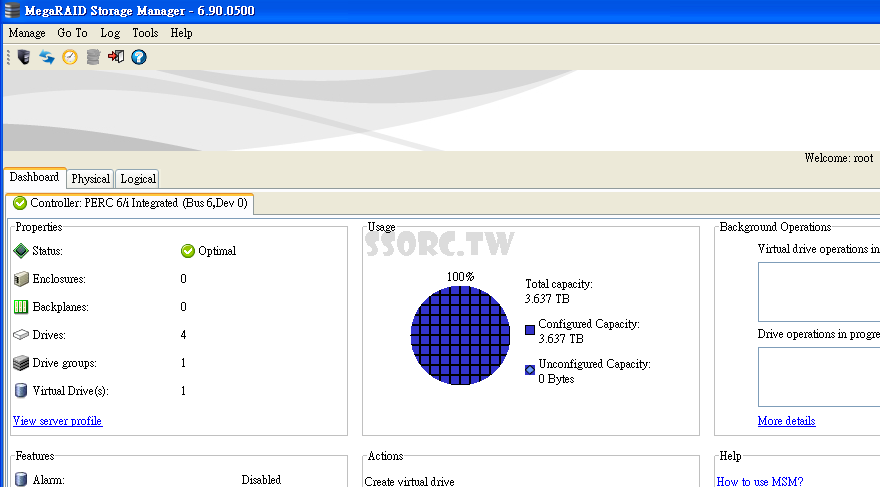
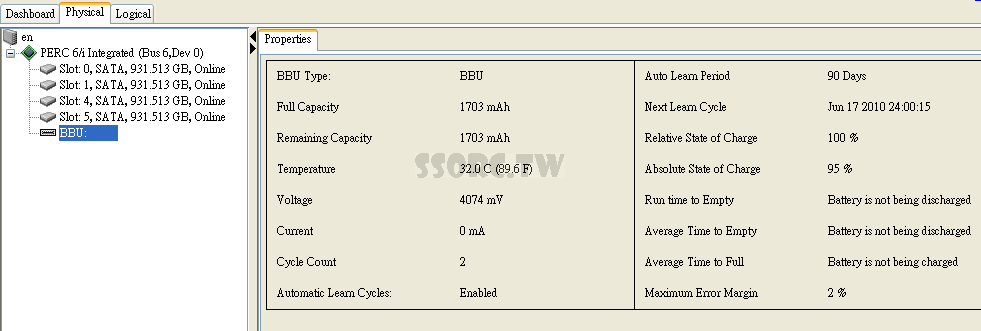
# windows 也可以安裝 MSM 來管理
# 下載 MegaRAID Storage Manager – Windows (MegaRAID Release 4.4)
# 安裝 client
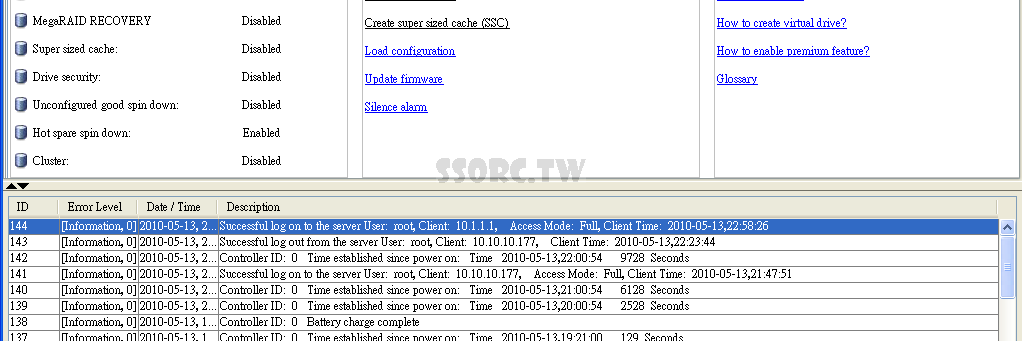
電池還有容量、溫度 (LInux 版也有啦)
留言